Friday, December 31, 2010

Happy New Year's Eve - Celebrate with Salsa!


HAPPY NEW YEAR'S EVE!


What an amazing year this has been. Can you believe 2010 is almost over? I can't. It's been whirlwind - and I know that as I look back on the year I am very, very grateful for the community we have here on Mystery Lovers' Kitchen. You make it a joy to cook, to blog, to read, to comment. I love getting to know all of you, and I look forward to our daily conversations. So let me take this moment to thank all of you for sharing your recipes, your stories, and your lives with us!

I chose today's recipe because I'd like to end the year with a feature from the Chicago Tribune's Best Recipes of 2010.

Why the Chicago Tribune? Because 2011 will begin with a feature in the Printers Row book section I'm particularly excited about.

Editor Julia Keller interviewed me about my White House Chef Mysteries and my Manor House Mysteries!
Woo-hoo!!

They sent a photographer out here and everything. The piece runs tomorrow and I can't think of a better way to start out the New Year!

To thank the Trib, I'd like to return the favor and feature one of the items from their fabulous "Best of 2010 Recipes" where you'll find sauteed scallops with chermoula, chocolate peanut butter pots de creme, and sweet potato and coconut custard with toasted coconut, among other mouthwatering dishes.

Today, the last day of 2010, I suggest we all
Celebrate with Salsa!

I love salsa. All kinds. Our favorite local restaurant serves a tomatillo salsa I haven't been able to recreate at home (yet), but I keep trying.

This one is a spicy new addition to my repertoire. Delicious and easy! I used only 2 serrano chilies. If you prefer yours less hot, you may want to drop it down to one.


Salsa Verde

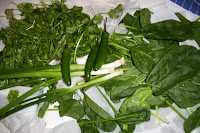
2 - 3 serrano chilies, stemmed and seeded (I used 2)
2 green onions, trimmed, roughly chopped (I used three because they were small)
1 or 2 cloves garlic (I used 3)
1/2 cup roughly chopped fresh parsley or cilantro (I used cilantro and didn't exactly measure. I think it might have been a bit more than a 1/2 cup.... but I really love cilantro)
1/4 cup extra-virgin olive oil
3 Tbsp fresh lemon juice
2 Tbsp water
1 tsp salt

Drop chilies, onions and garlic into a food processor with the machine running to mince finely. (Very excited to use my food processor - got it for Christmas *last* year and I've been trying out new recipes all year.) Add remaining ingredients. Process, scraping container once or twice, until smooth. Adjust with a little more water if needed for a smooth, slightly thick sauce. (I didn't need to add any water.)

This is so easy and so delicious. I know that the Trib's food editors combed through hundreds of recipes to come up with these "Best" choices. I can't wait to try out another!

Enjoy!


A little news here:

Buffalo West Wing received an amazing and wonderful review on Season for Romance here. I hope you stop by to read it (you have to click on the little brown bar beneath the cover to find the review).

Buffalo West Wing got ten out of ten stars! I am so excited. Not only that, but from what I understand this is the first time the reviewer "Kat" gave out ten stars. Am I excited? You bet!! Thank you, Season for Romance!

And a big thank you to Lori a/k/a Dollycas! She reviewed BWW yesterday on her blog here. Lori has a fabulous spot filled with great reviews and giveaways. Thank you, Lori!


I'm looking forward to another fabulous year here on Mystery Lovers' Kitchen. Thank you, Avery (Daryl), Cleo, Elizabeth (Riley), Jenn, Krista, and all our wonderful friends here. You are the best!

Happy New Year's Eve.
Celebrate, enjoy, and be safe!

Love and hugs,
Julie


Thursday, December 30, 2010

Appetizers Make New Year's Party


We're coming upon New Year's Eve. Happy New Year!


May this year bring you joy and happiness. May all your creative endeavors be positive. May you laugh and be surrounded by laughter. May you love and be surrounded by love.


And may you enjoy good company of friends (if you so desire).

For New Year's festivities, I'm always looking for new appetizers? Things I can serve on the 31st. Things I can serve watching football or while reading a good book (while others watch football).

I've stumbled upon a terrific herbed ricotta appetizer that is so EASY to make and so delicious to eat, and they're pretty. A plateful looks beautiful. So does a platter-ful. And guys like them just as much as gals. [This can also be made as a bruschetta "sandwich".]

For this batch of appetizers, I decided to try my hand at cheese making first. I've been told that making ricotta cheese was the easiest, so that's what I tried.

Ricotta cheese is fabulous. It's luscious and yet delicate and light. Though it was "harder" to do than I imagined, I really enjoyed the experience and I would do it again (now that I'm a seasoned veteran).

Just so you know, homemade tastes even better than store-bought. Definitely.

To prepare, you need a sieve, cheesecloth, a mixing bowl, and a 6-quart pot. Oh...and the ingredients (of course). And patience.


FRESH RICOTTA
(makes about 2 cups)

Ingredients:
2 quarts whole milk
1 cup heavy cream
½ teaspoon salt
1 fresh lemon

Directions:
You need a large sieve and cheesecloth.
Line the sieve with the cheesecloth and place the sieve over a large mixing bowl.
In a 6-quart pan, slowly bring the milk, the cream, and the salt to a boil over medium heat, stirring to prevent the mixture from scorching. This takes 3-4 minutes.

Squeeze the juice from one fresh lemon. It makes about 3 tablespoons. Add the lemon juice to the milk mixture, then reduce the mixture to low and continue stirring, about 2 minutes.
Pour the mixture on top of the cheesecloth in the sieve and let it drain for about an hour.
Discard the liquid in the bowl and reserve only the “curds” that are on top of the cheesecloth.
Keep the ricotta in a covered container and refrigerate. It will keep 3-4 days.

Now...for the appetizer, which IS EASY to make...

HERBED RICOTTA APPETIZER (and/or BRUSCHETTA)

Ingredients:


2 cups ricotta cheese
2 tablespoons scallions, minced
2 tablespoons fresh dill, minced
2 tablespoos chives, minced
2 teaspoons salt
2 teaspoons ground black pepper
1 loaf sourdough bread or your favorite crackers
olive oil [FOR BRUSCHETTA]
1 whole garlic clove, cut in half [FOR BRUSCHETTA]


Directions:
As I said, this may be made a couple of ways. Like a bruschetta (a meal) or just as a cold appetizer.

For appetizer: [easy!]

Combine the ricotta, scallions, dill, chives, salt and ½ teaspoon ground pepper.

Spread a tablespoon of the cheese on your favorite crackers.
Garnish with crushed pepper. [Do not use the oil or garlic from the ingredients above.]

For bruschetta: [a little more involved] [Sorry I don't have pictures of this one. We ate all the appetizers and ran out of the cheese mixture!]

Prepare a barbecue with medium-high heat.

Combine the ricotta, scallions, dill, chives, salt and ½ teaspoon ground pepper. Set aside.

Cut the bread in hafl and cut each half into 6 thick slices; 12 total.

When the grill is hot, brush the bread with oil and grill on each side for 2 minutes. Remove and rub with garlic clove.

Spread the herbed ricotta on the bread. Garnish with more pepper.

Serve with a crisp green salad.

If you want a few other appetizers from our Mystery Lovers Kitchen, click these links:


* * *
If you'd like to know more about A Cheese Shop Mystery series and want to download a few other recipes from me (on recipe cards), click on this link to my website: Avery Aames. I've posted recipes in the "morsels" section. There's lots of other fun stuff, as well. And sign up for the mailing list to get in on the next contest...coming soon.

Say cheese!

Wednesday, December 29, 2010

Collard Greens—From the Garden to the Table

RileyAdamsFoodBlogPostpic_thumb_thumb[3]Okay, y’all, I have a special treat for you today. I’ve been feeling sorry about how my pictures lately have been---well, less than picturesque. So today I have a pictorial journey for you, courtesy of my friend, Todd, who provided the illustrations for today’s recipe: collards! Yes, he actually went to a collard field, picked the greens, and cooked them. :)

Why do collard greens and the New Year go together? It’s a tradition in the Southern US to eat black-eyed peas and greens to ensure a lucky and prosperous New Year. The peas represented coins and the greens represent paper money. So there you have it! :)

126 124127 133

141

146 147

149 153005

COLLARDS

Ingredients

· One large head collards- 2, if smaller heads

· 5 cups chicken stock

· 3 tbsp butter

· 2 tbsp vinegar (white or apple)

· 1 tbsp sugar

· Salt and pepper to taste

· 1 tbsp red pepper flakes (optional)

Directions

Cut the leaves from the head and wash the collard greens thoroughly. Remove the heavy steams by shaving the rib with a knife. You can also fold the leaf and pull or cut the stem away. Not all leaves need to be stripped as tender stems can add good texture. Stack 5-10 leaves on top of each other, roll and slice into 1-2 inch slices. You can adjust the size of your slices depending on how hearty you want the collards to be. Place the collards in the pot and add the chicken stock and butter and bring to a boil. You may have to let the collards cook down slightly to get all in the pot (depending on the size of your pot). Once the collards have cooked down some, about 15 minutes, add the remaining ingredients and reduce to a simmer. Cover and let the collards cook for 1 to 1.5 hours. Stir occasionally and check to make sure adequate liquid is in the pot, adding water if necessary. Taste and adjust seasoning as appropriate.

These are especially delicious when served with several dashes of vinegar induced with hot peppers and a side of cornbread.

Enjoy and be prepared for your whole kitchen to have a collard aroma!

005Hope you all have a happy, lucky, and prosperous 2011!

Riley/Elizabeth
Delicious and Suspicious (July 6, 2010) Riley Adams
Pretty is as Pretty Dies –Elizabeth Spann Craig

Tuesday, December 28, 2010

New York Nuts for New Years (the candied kind) from Cleo Coyle

We were hit with a little snow
here in New York City...


No, this is not my car. 
If it were, I would opt for
public transportation until April.

Shovel, shovel, shovel....

Even the NYPD got stuck. Our street is one way.
This police van is going the other.


By the way, this photo was taken
12 hours
after the storm ended.
City services? Hello! We do love the NYPD,
but snow removal experts they're not.
Send a snow plow, a salt truck, something!


Cleo Coyle, New York nut,
and author of the
Coffeehouse Mysteries

So while we're waiting for the plow to come, let's consider New York nuts. It's a fact. People do crazy things in New York—like stand outside for hours on December 31st to watch a big ball drop at midnight. I’ve done it. My husband’s done it. Almost everyone who lives in NYC has done it, and most of us have done it only once. Why? Because it’s nuts!


It’s nuts because you have to get to the location eight to ten hours early and wait in freezing cold temperatures until the clock strikes midnight. It's nuts because, post 9/11, you aren't allowed to bring a backpack, a bag, or even a bottle of champagne. It's nuts because a bathroom break is nearly impossible. If you leave Times Square to hit a public facility, you won't be allowed back in. (More tips for seeing the Times Square ball drop here.)

In case you were wondering (because I was), the Times Square tradition actually began back in 1904 as a Don Draper-style marketing ploy to showcase the newly erected New York Times Building. Before then, people traditionally gathered at Trinity Church at the corner of Wall Street and Broadway to sing songs and wait for the church bells to ring at midnight. That first Times Square celebration drew 200,000 people. The organizers provided fireworks but no ball. Finally, in 1907 the ball was added and, with the exception of some years during World War II, has continued to drop annually to this day when it draws a physical audience of one million and a global televised audience of one billion. (More here.)


OH, NUTS!

There is a foodie analogy here but not a happy one...

For some time now, my husband and I have heard raves about the "famous" bar nuts served at New York's Union Square Cafe. Okay, Nathan's hot dogs we've heard of. Egg creams, check. Black and White cookies, yes. Junior's Cheesecake, of course. But we never heard of these "famous" bar nuts before they were featured on the Food Network's My Favorite Things.


That Don Draper power of sell worked well on me. "Let's try the recipe and link to it!" I told my husband, Marc. (Click here to see the recipe but keep reading because I don't recommend it.) Marc and I read the recipe and trekked to the green grocer to buy the ingredients. We followed the directions exactly. Finally, we tasted them. Oh, nuts! Not good. Not good at all! Rosemary is a lovely spice. I use it often in my kitchen (see my recipe for Rack of Lamb with Rosemary and Lemon here). But in this recipe, the piney rosemary completely overwhelmed the flavor of our beautiful, fresh nuts. We also thought tossing the nuts in butter after they were toasted took away some of the crunch that we really think is essential to enjoying a nutty snack.


What to do?

Because I really wanted to blog a nutty snack recipe in honor of our New Year's nuts, I turned to another famous New York nut -- the candied variety. Here in the city, you'll find hot, freshly sugared nuts cooked right on local vendors' carts. David Lebovitz does a version here that will work with whole, round, raw nuts like peanuts or almonds. Today, I'm going to share my own quick and dirty version that works better for walnuts, pecans, cashews, and chopped hazelnuts (the kind of nuts that have nooks and crannies).

Finally, if you have a favorite nut recipe to share for New Year's Eve snack bowls, by all means tell me about it in the comments section or leave a link. (I just hope it doesn't include rosemary!)


Cleo Coyle's
New York Nuts

Ingredients

Any combination of...

Walnuts, pecans, cashews, and/or chopped hazelnuts (see my note)*

Butter (see below for amount)

Light brown sugar (ditto)

*Nuts not to use in this recipe: almonds, Brazil nuts, peanuts. The almonds are too bitter, the Brazil nuts too big, and the peanuts not a mild and sweet enough flavor to work well here.

Ratio: For ever 1 cup (in volume)* of nuts, use 1-1/2 Tablespoons of butter, and 1/4 cup light brown sugar, packed. *(By weight: 4 ounces or about 100 grams)

Directions: Place nuts in warm skillet and toss over medium-high until nice and hot. Add butter and continue tossing to coat the nuts. Before butter is completely melted, add the light brown sugar. Continually stir the nuts and sugar in the skillet until the sugar melts. Pour the hot, candied nuts onto a baking sheet that's been covered in parchment paper. Scrape any remaining syrup over the nuts and spread evenly into one layer.  When the nuts have completely cooled and dried, break apart any large clumps and eat with joy!

An important question: Why not just melt the butter and sugar together in the skillet and then add the nuts? While this method will work, I find that working the undissolved sugar into the nooks and crannies of the walnuts, pecans, cashews, and/or chopped hazelnuts gives a much more delightful result. Also, warming the nuts in the hot pan will partially toast them, bringing out their flavor, as well.


Happy
New Year,
Everyone
...

GO NUTS!

~ Cleo Coyle, author of
The Coffeehouse Mysteries

To get more of my recipes, win free coffee,
or find out more about my books, visit me
 at my *virtual* coffeehouse:


Click on the book covers above
to learn more about Cleo's culinary mysteries.

Monday, December 27, 2010

The Secret to Perfect Hash Browns

This story began in October. One of the Christmas magazines featured a breakfast dish that looked terrific. The basic idea was to cook shredded raw potatoes (okay, hash browns) with red pepper (and possibly an onion) in an iron skillet.


When you flip the potatoes, you make wells in them to accommodate eggs and then finish the whole thing off in the oven. Sounded great. So when I had company, I followed the recipe and it looked like this.

Trust me, the picture in the magazine looked a whole lot better! I don't know if it tasted better. The potatoes were mushy. We all agreed that there's something special about hash browns. That crispy exterior can't be beat, and the potatoes in this dish didn't quite make it. We all loved the traditional concept of a soft yolk over crispy hash browns, though.


If you're like me, there are some dishes that just don't turn out well for you. Hash browns are one of those dishes for me. I've never quite managed great hash browns. So I went on an internet search of hash brown recipes to find out what I was doing wrong. Every time, they bombed.


And then I happened to run across
a recipe posted by someone named Elise. It's very cute. Her father's hash browns are always better than her mother's. Why? Because he presses out the liquid with a potato ricer!


I was itching to try it. But where was the potato ricer? It's not one of my favorite kitchen items. Where had I put it? Ah, my mother would surely know where hers was. Apparently -- like mother, like daughter. Two households and no one could find a potato ricer. I tried pressing out the liquid like Elise's mother does, between paper towels. No go. Soggy hash browns.

So when I was baking Christmas cookies, I reached for cookie cutters and, by golly, there was the potato ricer. You know what I did next!

I shredded two red skinned potatoes (you're supposed to use russet), crammed the potatoes in the ricer and pressed. This is what came out -- nearly 1/4 cup of liquid!


I used my favorite frying pan with a generous amount of olive oil and heated it just below the middle temp until a drop of water sizzled in the pan. In went the potatoes. I did not press them flat. The hardest part was waiting and resisting the temptation to peek underneath or hurry them along. When the bottom seemed to be set and golden brown, I slid a metal spatula underneath and expected them to stick. They didn't! They turned beautifully! A little salt and the result was perfect hash browns. Our only complaint was that there weren't enough!

Perfect Hash Browns
with thanks to Elise and her father!

peeled russet potatoes
salt and pepper
olive oil

Shred the raw potatoes. Insert in potato ricer and press out liquid. Heat frying pan just below medium heat until a drop of water sizzles in the pan. Add potatoes and cook until the bottom is set and golden brown. Flip and cook through until the bottom is golden brown. Add salt and pepper and enjoy!


I wish you all perfect hash browns every time and a very happy New Year full of good friends, good times, and good food!


~ Krista

Sunday, December 26, 2010

Guess who's Guesting? Me!

Twas the day after Christmas and whaddya know?
Guests for this blog day were all a no-show!

Can't say that I blame them, they've used up their zest,
Presents are opened, it's now time to rest!

* * *
Okay, lame poem... but you get the idea.
Today is the day after Christmas, which means it's either a quiet day at home or a crazed trip back to the stores for returning unwanted items and snatching up great deals.

Here's where I would usually include a recipe. But.... I'm not planning to cook today. Are you?

Instead I might open a nice bottle of wine. But before I do, since I'm the official guest here today, I'm going to talk just a little bit about my new book, Buffalo West Wing, which comes out January 4, 2011.

With a new First Family, White House executive chef Olivia Paras can't afford to make any mistakes. But when a box of take-out chicken mysteriously shows up for the First Kids, she soon finds herself in a "no-wing" situation. After Olivia refuses to serve the chicken, the First Lady gives her the cold shoulder. But when it turns out to be poisoned poultry, Olivia realizes the kids are true targets.

I'm very excited about this new adventure. If you've read Eggsecutive Orders, you know Ollie made a pretty big decision regarding her love life in that one. This one picks up over a year later, when her heart has settled down and she decides she doesn't have time for a relationship (uh-huh, heh heh).

I just love throwing challenges at Ollie! She somehow always works through them, although she occasionally fights back and tells me "No way!"

Anyway, I digress.

I have a huge box of beautiful Buffalo West Wing bookmarks just waiting for good homes. I would love to send you some -- with one small catch. If you'd like bookmarks for yourself and to pass out to friends, check my blog here for guidelines. Happy as anything to send them to you!

I've already had a slew of requests for bookmarks via a random "free bot" that notified the world... and I'm sitting home, now that Christmas is complete, the family fed and pampered (me too!) addressing a bunch of envelopes to send these bookmarks out.

As I do, I'm sipping a nice red wine.... Which brings me to my topic today.

I am not a wine connoisseur. Ooh, no. But, after many years of suffering through vinegary vintages because I just didn't know better, I've finally gotten to the point where I truly believe life is too short to drink bad wine. Now I'm eager to learn how to tell the difference!

Note, I didn't say cheap wine. There are some wonderful wines out there under $15 per bottle.

A couple of years ago, my husband and I joined the wine club at our local winery/restaurant - Cooper's Hawk. Fabulous decision. Every month we try a new wine - and every month we receive a newsletter explaining the new wine, how it was made and what it's best enjoyed with. (PS - just added --For Christmas my husband surprised me with reservations for the next "Study in Reds" at Cooper's Hawk and the girls got us a red wine mini-aerator and red wine glasses. How fun!)

I guess everybody knows where I've been leaning lately, huh? My husband and I even went a step further and created our "Wine Spreadsheet of Fun."

My husband is an accountant, which means we live by spreadsheets. Our trip to Europe was plotted on a spreadsheet. Every trip to Disney is on a spreadsheet. I kid you not. But you know what? It works marvelously well and we're now using one to chart the wines we try, how much we pay, and then we include a few notes about our impressions.

Two recent red standouts are the Nebbiola Barbera from Cooper's Hawk (2010) and the Chianti from DaVinci (2008). Wow.

Although I like a good Gewurztraminer from time to time, my husband and I usually prefer smooth reds, especially those that are full-flavored, good aroma, with no bite. We recently received a gift certificate to a local wine store, and we had so much fun picking out choices from France, Italy, Argentina and even a few domestics.

I tend toward Merlot, my husband toward Cabernet Sauvignon. But we both enjoy a good Malbec and we're happy to try something new.

On this lovely day after Christmas, I'd like to ask you for something... recommendations for our next wine shopping trip!

So... let me know... what wines do you like best?

Julie

Don't forget to stop by my blog for bookmarks...

Saturday, December 25, 2010

Season's Greetings!

Here's a video greeting from all of us in the kitchen...


...Happy Holidays!

Friday, December 24, 2010

Cake Balls - the experiment!


I'd like to tell you that I came up with this brilliant idea for (yet) another holiday treat, but that wouldn't be the truth. I'd also like to tell you that I decided to make this dessert because we needed it... but that wouldn't be the truth, either.

The truth is ...
... wait ...
Can you handle the truth?
:::grin:::

I cleaned my cabinets. Long story there, but that's for another post. While I cleaned, I noticed that a few of the items on my shelf had passed their expiration dates. Out they went. I also noticed a couple of my cake mixes were just on the edge. Rather than toss them out, I decided to use them. My middle daughter had heard about cake balls and suggested these were just the thing for my soon-to-be-out-of-date mixes.

So we ran with it.

There are a number of cake ball recipes online and most follow the same instructions using cake mix, store-bought frosting, and almond bark.

The thing is - no one in my family likes store-bought frosting. Not even the "tastes like homemade" kind. So we used our family's favorite homemade cream cheese frosting instead. That means, of course, that these balls need to stay in the fridge when they're not being consumed, but the cream cheese makes that extra effort worth it.

Super easy, kind of fun, and versatile, this is a recipe I will turn to again.

Think about it - you can change the dough, the bark color, the decor. These could be made for almost any holiday, or bridal and baby showers with just a tweak or two.

Here goes:

CAKE BALLS


STEP ONE:
1 cake mix, your choice of flavor, prepared according to package directions. While it's cooling...

STEP TWO:
Make frosting:
(I got this recipe from my mother in law years ago. Best frosting ever!)

1 8oz package cream cheese
1 stick butter (softened)
2 cups powdered sugar
2 tsp milk
1 tsp vanilla

Beat it.

STEP THREE:
Combine finished cake (still slightly warm is okay) with frosting. I like to start by tearing the finished cake up and crumbling it into a separate bowl. Then add the frosting. You can begin with a spoon, but you'll eventually want to use your hands. Messy!


Once it's all fully combined, roll into 1-inch (or so) balls and place on wax/parchment paper on cookie sheets. Cool in refrigerator to set. While they're cooling...


STEP FOUR:
Melt almond bark. Hard to give you an amount here. Just eyeball it. I used six rectangles of milk chocolate and six squares of vanilla-flavored. Two different manufacturers so the unit sizes varied. Like I said - just eyeball it.


I started by dunking the balls in the melted milk chocolate, but they seemed too heavy and the chocolate was used up too quickly. I switched gears and decided to pour spoonfuls of melted bark over the balls instead. I like that much better.


If you're going to use sprinkles, add them right away. The bark hardens quickly!


Once it is hardened, you can use a contrasting bark for decoration (as I've done here) or mix up a little powdered sugar and water, and decorate with that. With the addition of sticks, these can become cake pops. Maybe add a face, ears, nose.... I probably could have made mini Rudolphs.


With a little creativity they can be almost anything....
The possibilities are endless!


Happy Christmas Eve today
and tomorrow...
Merry Christmas!

Warm hugs,
Julie


Thursday, December 23, 2010

Winner of Thursday's contest

Thanks to all who made comments today. It's wonderful to hear what all of you write, from blogs to "bad poetry" to lists and steamy romance and more.

The winner of today's copy of The Long Quiche Goodbye, by random number generator, is:

Erin, who writes steamy romance novels.

Congratulations!

Send me your snail mail address and the book will go out forthwith. You can contact me at Avery (at) AveryAames (dot) com - smashing that all together in an email address, of course.

Dulce D'Leche Goat Cheese Cookies

Since I have been working hard all week on edits of Lost and Fondue, (and I'm done...and now it's on to the holidays...) I needed a break and that meant baking cookies!

I know Krista just had a cookie contest and Cleo just shared her beautiful Pfeffernusse cookies, and you might be cookie'd out, but I adore cookies. Making cookies is therapeutic for me. I love mixing the dough. I love the aromas of the spices that go into them.

I love the aromas that emanate from my oven. The house smells great for days. I enjoy how my dog hovers nearby while I bake. He knows he'll get a biscuit when I get my first cookie. [If I eat, he eats. We graze all day. That's just our way.]

The next best thing about cookies are that they can be an incentive. If I write 50 pages...it's cookie time. If I edit 100 pages...cookie time. You know the drill. Set a goal; reward yourself. The system has worked for me for years.

My grandmother's basic sugar cookie recipe is the absolute best (BEST), and I'll share that one soon, but this week, I'm inspired by a recipe I found in the newspaper. It's a shortbread cookie, stuffed with Dulce d'leche filling and melt-in-your-mouth fabulous. There are two ways to make it--with goat cheese and without. I tweaked the recipe to suit my tastes.

*By the way, our very own Julie Hyzy taught me how to make the Dulce d'leche. I've linked her delicious recipe below (It is on our MLK site)!


Back to the filling...I kid you not. Goat cheese!


Here's the recipe -- both regular and gluten-free.

To my gluten-free buddies, I was surprised how well these cookies turned out. They are crispy and my regular eaters couldn't tell the difference at all! I think it's the pecans that are thrown into the mix.

The dough freezes well, too. So you can make half a recipe, freeze it, and bring it out again when you have a party.
(If...you can talk yourself into not eating the whole batch!

Good luck there.)


GLUTEN-FREE ingredients - DULCE D'LECHE GOAT CHEESE COOKIES

(makes 2 dozen “single” cookies; 12 sandwiches)

1 stick butter, melted

1/4 cup brown sugar, packed

1/8 cup confectioners’ sugar

1 large egg yolk

1 cup gluten-free flour

1 teaspoon Xanthan gum

3 Tablespoons pecans, chopped fine

2 ounces goat cheese

3 ounces dulce de leche

EXTRA powdered sugar for dusting


REGULAR ingredients - DULCE D'LECHE GOAT CHEESE COOKIES

(makes 2 dozen “single” cookies; 12 sandwiches)

1 stick butter, melted

1/4 cup brown sugar, packed

1/8 cup confectioners’ sugar

1 large egg yolk

1 cup flour

3 Tablespoons pecans, chopped fine

2 ounces goat cheese

3 ounces dulce de leche

EXTRA powdered sugar for dusting


DULCE D'LECHE INSTRUCTIONS - MAKE AHEAD - IT'S EASY:

DULCE DE LECHE: Easy homemade: Take a can of condensed milk. Pop two holes in the top. Place the can in a deep pan of hot water. Do not have the water cover the holes! Bring water to a boil. Turn the heat down to simmer and cook for 2 hours. Remove the can and let the can cool. Remove the top and you have Dulce de leche (caramel).

BAKING INSTRUCTIONS FOR EITHER VERSION OF THE COOKIE:

Preheat oven to 350 degrees.

In medium-sized bowl, whisk butter and sugar, about 2 minutes. Add the yolk and whisk. Fold the flour (and Xanthan gum for gluten-free) into the bowl. It will become moist and clump together. (It will not be as smooth as regular cookie dough. Stir in the pecans.)

Roll the dough into a ball and then, on wax paper, roll it into a log/roll about 8-10 inches long. Wrap the log and twist the end of the wrap. Refrigerate (at least 2 hours or overnight).

Remove dough from refrigerator and unwrap. On a cutting board, slice off the ends (you may still cook these, but don’t use for “sandwiches” - good tasting slices). Slice the log into 24 slices. They will be thin.

Place the slices ½ inch apart on baking sheets. Put the baking sheet (s) in the oven. Rotate the sheets after about 6 minutes. Bake cookies for a total of 12-14 minutes, until golden brown. Let cool. [ROTATING IS KEY]

While the cookies are cooking, warm the dulce d'leche over low heat. Don’t let it bubble. Remove from heat and add the goat cheese. Stir until well mixed. Cool.

Sandwich a teaspoon of the dulce mixture between 2 cookies and dust with powdered sugar.

These cokies may be eaten single, with just powdered sugar, and no dulce d'leche. Like a tea cookie. They may also be dipped into caramel sauce...fun for the chef.


Julie Hyzy's Caramel Apple Dip - She makes dulce d'leche for the dip and it's fabulous! CLICK THE NAME OF THE RECIPE FOR THE LINK.

* * * * * * * *

Now...for a Christmas treat...who among you write out there? I'm not talking just mysteries. Do you write poetry, write in a diary, do you blog, do you write scientific journals? Do you write thank you notes?

Share what you write in a comment. I'm giving away 1 free copy of THE LONG QUICHE GOODBYE today to a commenter as a thank you for all the good wishes throughout the year!

If you've read the book already, you can give it to a friend!

C'mon, leave a comment. :)

Happy holidays!!!

PS. Yoo-hoo to winner, Ashley, from last Sunday's giveaway for our guest blogger Janet Rudolph. You have not contacted me yet. You need to send me your snail mail address by this coming Monday or I'll have to pick another winner. Email me at avery (at) averyaames (dot) com.


And last but not least...a sneak preview of book two: Lost and Fondue is up on my website. Check it out at AVERY AAMES.

While you're there, sign up for the mailing list and you'll be included in future contests coming up to promote Lost and Fondue.