Showing posts with label Lost and Fondue. Show all posts

Wednesday, May 2, 2012

HAPPY CINCO DE MAYO


Hi, all. Just got back from Malice Domestic conference and the Festival of Mystery conference. I posted lots of pictures on my Facebook page.  What a blast we had. Meeting readers, sharing laughs with great friends.


Sisters in Crime Guppies (me) Kaye George, Janet Bolin, Rochelle Staab, Krista Davis & Leslie Budewitz
 I hope you'll check out the photos and leave comments. Enjoy!


And now...

Happy Cinco de Mayo.

Okay, it's not the fifth of May today, it's the second, but I like Mexican food and I love to celebrate.  My mother did, too, so in honor of mother's day which is soon, too, I'm sharing my mother's favorite drink: a margarita. She served it with the caveat that you couldn't have more than one and a half. My mother was never a stickler when it came to drinking, but in this regard, she KNEW. This drink is POTENT!  So beware but enjoy. Olé!  By the way, Grandmére in the Cheese Shop Mysteries likes her occasional cocktail, and this is one I've mentioned in the books.


Margarita ala Joanie (my mom)
(1 drink)
1 jigger nice tequila (spoil yourself; at least go for Cuervo Gold)
1 jigger Rose's Lime Juice (found in the beverage or juice section of a grocery store)
2 jiggers Triple Sec

Mix together. Rim a glass with margarita salt. Set 3-4 cubes of ice in the glass. Pour in the margarita mixture. Enjoy!


In addition to margaritas, my mother loved food.  LOL

One of the foods she loved was shrimp. So, again, in her honor, I offer you a "ceviche" tostada (made with corn tortillas). Needless to say, this goes great with a margarita.


SHRIMP CEVICHE SALAD WITH CORN TORTILLAS 
AND FETA CHEESE

INGREDIENTS:

1 pound cooked medium shrimp (see below)
1 Roma tomato, chopped
1 avocado, chopped
½ cucumber, peeled, chopped
¼ red onion, chopped
1 teaspoon dried oregano
1 teaspoon dried parsley
1 teaspoon salt
1 lime
8 corn tortillas
2 tablespoons oil
½ cup crumbled feta cheese

DIRECTIONS:

Pinch the tails off the shrimp. Cut in length half-wise. {Note: I find this easiest with kitchen scissors, starting at the fat end.} Chop the tomato, avocado, cucumber, onion. Put shrimp and vegetables into a bowl. Sprinkle with oregano and parsley and salt.  Cut lime in half and squeeze (as hard as you can) over the shrimp mixture. Let mixture stand.

Heat half of the oil in a skillet. One at a time, cook the corn tortillas, grilling to warm brown on each side. Remove and drain on paper towels as you cook the other.

Assemble the salads: 1-2 tortillas, ¼ of the shrimp mixture. Top with 2 tablespoons of feta cheese. Sprinkle with more parsley to decorate.


Now, one last "Mother's day" "cinch de Mayo" celebration.

Okay, it has nothing to do with either, but my mother would be very excited...


I'm pleased to announce that my alter ego Daryl Wood Gerber (who is actually the real me...if you've noticed on occasion) has a new book deal!  [Mariachis, strum those guitars!!]

 I've been keeping this close to my vest until it was official.   It's a three-book deal (so far). In July of 2013, the first of The Cookbook Nook Mysteries will debut.


This is a new cozy mystery series featuring Jenna Hart, an avid reader, admitted foodie, and owner of a cookbook store in picturesque coastal California. The first in the series is titled: BY HOOK OR BY COOKBOOK. The books will include recipes and lots of tidbits about cookbooks! Check out my updated website! DARYL WOOD GERBER

And, don't worry, Avery will still continue to put out Cheese Shop Mysteries. The next comes out February 2013. I'll be a busy girl next year. Not as busy as some, but busy for me!

So..what is your favorite cookbook?


* * * * *

You can learn more about Avery by clicking this link.
Chat with Avery on Facebook and Twitter.

You can learn more about Daryl by clicking this link.
Chat with Daryl on Facebook and Twitter.

And if you haven't done so, sign up for "our" mailing list
 so you can learn about upcoming events, releases, and contests!
You'll hear everything first in "our" newsletter!

Say cheese!


Cookbook 'em, Dano!

***********


Wednesday, April 4, 2012

Easter Brunch Apple Danish


I am married to a wonderful man. I'm Christian. He's Jewish. Our family has celebrated both Easter and Passover for many years. Our combination of religions has made us see a bigger picture; we think God does, too. Our combo has also made me learn how to cook a variety of foods, including ham and brisket  (not together! LOL).  I can make waffles and potato latkes. I know how to prepare Charosos (pronounced: har-oh-sis, with a sort of guttural "h" at the beginning). It's made with apples, nuts, wine, and cinnamon (a requirement at a Seder dinner), and I know how to dip Easter eggs so the color is just right!  Vinegar to water balance is key.

I also know where NOT TO HIDE those Easter eggs so that you don't find them until the following year. [I actually make a list and keep count. Sometimes the adults are doing all the hunting in the end for the "missing" egg. Too funny.]

This year, after a Seder dinner on Friday, we're celebrating Easter on Sunday. We're having an egg hunt and I'm serving brunch, and I thought what could I do instead of waffles?

I saw a recipe for apple galette in a cheese course book that a girlfriend gave me, and thought, hmm, sounds like apple pie but looks so pretty and it's different. A galette  is basically a danish.


As many of you know, I need to eat gluten-free, so sometimes making pastry isn't all that easy. I've gone for the store-brand pre-made GF pie shell in the past, but this recipe called out to me (I have craved a good danish ever since I went off gluten), and I have to say I'm never going back to store-bought. It was so easy to make this "shell" and it tasted fabulously rich. The butter definitely made the difference. (Not good for the waistline, so good for the taste buds.)

Truly, making the pastry was easy. I used a food processor to mix up the dough. Huge help!  The dough held together. When it cooked, the dough crisped up perfectly. And the Gouda cheese made it...well, "not just gouda...great!"  (...to coin a phrase that fellow author Lorna Barrett coined for my first Cheese Shop Mystery.)

GLUTEN-FREE APPLE GALETTE WITH GOUDA

[This can be made with normal flour - sub out the rice flour and omit the Xanthan gum...that's all.]

Ingredients:

1 cup rice flour (or mixture of choice)
¼ teaspoon salt
1 stick (less half tablespoon) unsalted butter (cold)
3 Tablespoons ice cold water
1 pound apples (Granny Smith)
3-5 Tablespoons sugar (depending on your taste)
1 egg yolk whisked with 1 teaspoon water
4 ounces (1/2 pound) aged Gouda

Directions:

To make the dough: in a food processor, combine flour, salt, and half of the butter, diced into small bits. Pulse. Add the rest of the butter, diced into small bits. Pulse. The mixture should resemble small peas.

Move mixture to a bowl. Add the ice cold water and stir with a fork. You might need to knead the mixture with your fingers (sparingly) until it holds together. Form a ball. Pat it into a hamburger-patty sized flat round. Cover with waxed paper and set in refrigerator for an hour.


Meanwhile, pare the apples, quarter, core, and then cut into thin-thin slices. Also, make the egg yolk and water mixture. Set aside.

Preheat the oven to 425 degrees.

Remove the dough from the refrigerator. 


Set it on a gluten-free floured board. Cover with a fresh piece of wax paper. Roll it out to about a 12-inch round. If necessary, reach beneath the wax paper and pinch pieces of flour together so no cracks form. Remove the wax paper, slice off the jagged edge so you have a circle. Set the circle on a flat (round if you have it) baking pan. (I use my pizza pan.)


Layer the apples (about 2 ½ cups of slices) in the center of the galette, leaving about 2 inches of dough free. Sprinkle the apples with sugar. Gently fold up the edges of the galette, pinching together where necessary to prevent cracks in the dough. Brush the dough with the egg wash.  Set in the oven to bake for 30 minutes. [Check to make sure it doesn’t burn. This is a hot oven.]

Serve warm with shavings of aged Gouda on each portion.

So on this Easter, or Passover, or if you simply celebrate the newness of Spring, may you enjoy good health, hope, a happy vision of your future, and be inspired to love not only yourself but those who mean so much to you! New things are on the horizon!


* * * * *

You can learn more about me, Avery, by clicking this link.
Chat with me on Facebook and Twitter.

And if you haven't done so, sign up for my mailing list
 so you can learn about upcoming events, releases, and contests!

ALSO...DO YOU KNOW ABOUT MY ALTER EGO
DARYL WOOD GERBER?

"Like" Daryl's page on Facebook and "follow" Daryl on Twitter.
She doesn't say all the same things I do.
And pretty soon she'll have some fun news to share!

You'll hear that first in Avery's newsletter!

Say cheese!

***********


Wednesday, March 7, 2012

Zucchini Circles Recipe from CLOBBERED BY CAMEMBERT


In Clobbered by Camembert, Charlottes visits her grandparents when she needs a little down time and feedback on the crime she is trying to solve. The twins are there, too, helping Pepere build an aquarium.


While Charlotte talks to her grandfather (with the twins inserting their two cents) Grandmere offers to make a quickie snack before the twins have to run off to their vocal rehearsal. It turns out the snack is one of Charlotte's favorites: Zucchini Circles. She salivates in expectation.

Now sometimes people ask me how I am like Charlotte, or vice versa, and it turns out that she and I share this same love of fried zucchini. I remember years ago going to a restaurant called Hamburger Hamlet and sharing these little morsels with my stepdaughter. We would play backgammon and snack and I would learn what she was going on in her life. These were special moments for us, and fried zucchini will always be part of that memory.

BY THE WAY, they are fabulous dipped in sweet jammy sauces or just plain. And a glass of sauvignon blanc (for me, not my stepdaughter who was about anywhere from twelve to sixteen), added just the right balance.

Now that I eat gluten-free, I make these my way, without using regular flour, and they turn out just the same. So enjoy!


 ZUCCHINI CIRCLES

Ingredients:
(serves two)

3 Tablespoons oil
¼ cup bread crumbs (I used Gluten-free corn crumbs)
¼ cup grated Parmesan for recipe
¼ cup grated Parmesan for garnish
1 teaspoon salt
½ teaspoon garlic powder
1 egg
1 large zucchini

Directions:

Slice zucchini into round slices.
Stir egg in a bowl.
Pour crumbs and ¼ cup Parmesan into a pie tin and mix with seasonings.
Heat oil in a skillet on high.  As it heats, drop zucchini circles into egg.  Remove from egg and roll in the cheese crumb mixture. 

REDUCE heat to medium and lay in all the zucchini slices.  Let brown about 2-3 minutes.  Using tongs, flip.  Let brown on the other side, 2-3 minutes or as crispy as you like.

Remove from plate.  Set on serving dish.  Top with grated Parmesan.

Serve immediately, as side dish or appetizer.


FYI:

Health benefits of zucchini: 
Helps in the cure of asthma, as it is packed with Vitamin C and antioxidants.
Its nutrients also contain lutein, good for the eyes.
Zucchin is also packed with magnesium and phosphorous, which is good for building and maintaining healthy bones.
Zucchini's nutrients helps against the fight of colon cancer.
Zucchini is high in water content and low in calories.


* * * * *


You can learn more about me, Avery, by clicking this link.

Chat with me on Facebook and Twitter.

And if you haven't done so, sign up for my mailing list
 so you can learn about upcoming events, releases, and contests! I had two winners just last week whom won Sur la Table cheese paddles!

Say cheese!


***********


Wednesday, January 18, 2012

Baked Camembert - Say cheese!


I'm getting very excited. 


CLOBBERED BY CAMEMBERT comes out in less than three weeks. And I have to say it's one of my tastiest mysteries yet. 


{Or at least it has been for me. I've been testing Camembert recipes!}


To celebrate, I'm having a Get Cozy with a Mystery contest, in conjunction with my author pal Kate Carlisle [BIBLIOPHILE MYSTERIES]. It'll be live this Thursday, so look for messages in Twitter, Facebook, my newsletter, and in next week's blog right here. You'll see how easy it is to enter. You could win a signed copy of both Kate's and my new books, as well as a Bibliophile mug and a cheese board (great for serving cookies if you want to get real cozy). It will run through February 1st.

In honor of Clobbered by Camembert, I'm doing a series of Camembert dishes for the next few weeks. 


The first is so easy it's scary.  This is baked Camembert. It is an absolutely gorgeous and delicious way to serve the cheese. Warm and savory, it melts in your mouth.

Set on foil
For those of you who didn't get my recent newsletter, here's a little bit of history about Camembert. The cheese is a soft, bloomy-rind cheese created in Normandy, France in the late 18th century. The original was made with unpasteurized milk and, according to the AOC, (governing laws in France) must still be made with unpasteurized milk. In America, it is made with pasteurized milk. 


The two flavors can be completely different. The ripening process is what gives the cheese its flavor. It is similar to Brie, with a rich, creamy center. At first, the cheese was iffy in color. It wasn't until 1970 that white rind became the standard. Camembert is transported in little round boxes. These boxes made it easier for the cheese to travel great distances, particularly to America, where it is extremely popular. It was often given out to the troops in World War I because it traveled so well.


Enjoy!


BAKED SUPER-EASY CAMEMBERT

Cut off the top, discard.
Ingredients:

1 8 oz. Camembert round
salt
pepper
garlic
cayenne
jam (of your choice)


Season


Directions:


Preheat the oven to 350. 
Cut off the top rind of the cheese and sprinkle salt and pepper over the bottom portion of cheese. (Discard top)
Set the cheese on foil.


Bake in the oven until softened and the top turns a golden brown, about 20 minutes. 


The cheese bubbles to a golden brown.


Serve on a platter with crackers or crusty bread. 


This is great with fruit jam. 


The center literally oozes with richness.


* * *
You can learn more about me, Avery, by clicking this link.

Chat with me on Facebook and Twitter.

And if you haven't done so, sign up for my mailing list
 so you can learn about upcoming events, releases, and even more contests!

I'll be signing books at Mysterious Galaxy in Redondo Beach February 7, Murder on the Books in Houston February 11, and another bookstore (TBA) in the San Francisco Bay Area February 18. Check out my event calendar for more info.

 CLOBBERED BY CAMEMBERT, coming out February 7, 2012.


* * * * * * * *


Wednesday, January 11, 2012

The Ease of Travel with Gluten-free Applesauce Cake


Hi, all. My new blog day is Wednesday, so here I am. I'm so sorry that Elizabeth Craig aka Riley has left our group, but as she said last week, a woman can only do so much!

I hope you'll embrace me on Wednesdays!

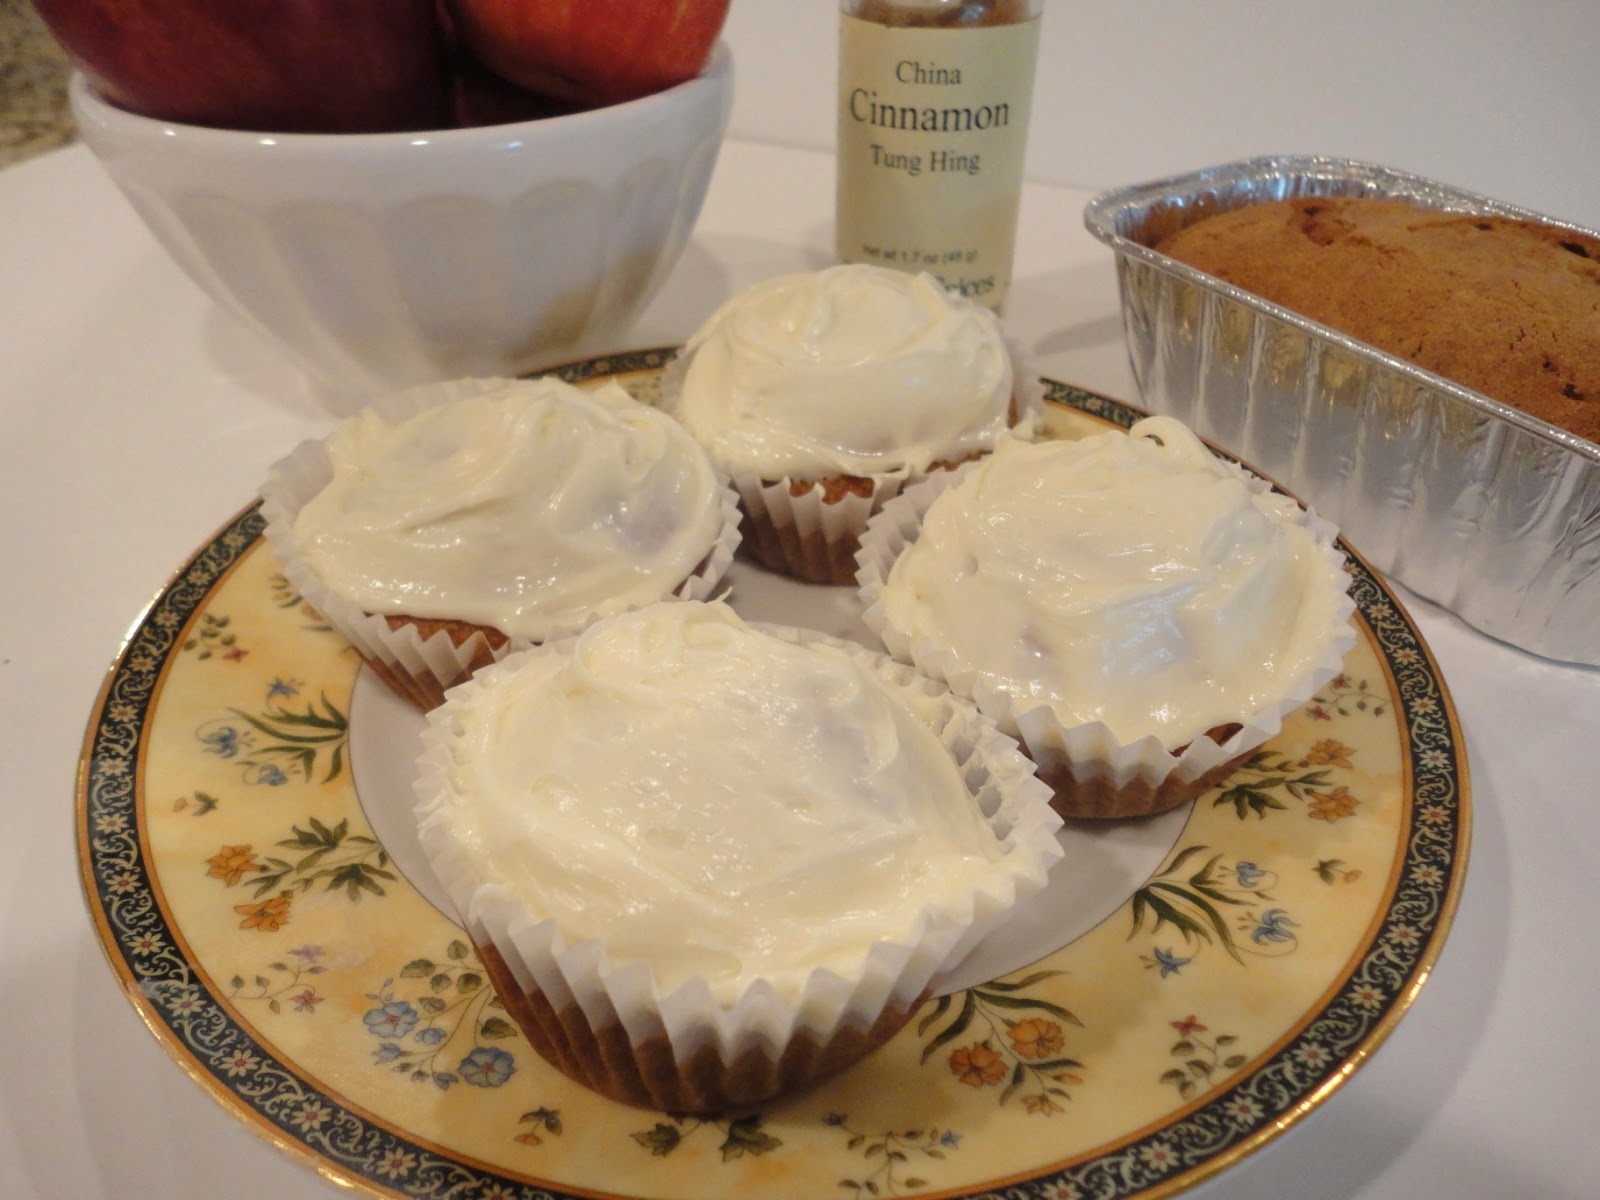
Over the last week, I travelled across the country. Because I need to eat gluten-free and it's not all that easy to find gluten-free homemade treats while on the road, before I leave home, I usually cook up a batch of either gluten-free banana bread or applesauce cake. They're so easy to make and they stay moist for an entire week (in or out of the refrigerator). I love the flavor of the spices. With a cup of coffee, a slice of this cake (or a cupcake) is divine.

Now, some of you might know, having seen all the photos that I posted on Facebook, that I was in New Orleans to attend a conference that my husband dragged me to. (Yeah, ha!  Dragged. NOT!)  What fun we had. New Orleans is a fabulous city. One of the most famous places there is Cafe du Monde. I was able to have the coffee and hot chocolate but not their renowned beignets. Instead, I brought along my applesauce cake and had a grand old time.  (It never dawned on me to ask the cafe folks for a side of powdered sugar. Duh! Next time...)

While in the city, I had the great pleasure of seeing my son and DIL. They live in New York but came down for the football game.
My son Jackson with proud "mom"

We had a great time, touring the city, going to the museums. Seeing the resilience of the people during Hurricane Katrina. Seeing the Preservation Hall Band instruments. Visiting cemeteries and seeing some famous crypts.

Doesn't this remind you of the movie: Double Jeopardy?


The crypt for Marie Leveau, the famous "queen" of voodoo. 


Nicholas Cage has his own crypt, inspired by his National Treasure movies.


I have to admit that seeing a number of empty or decayed tombs, some hollowed out and adorned with voodoo candles inspired me with an idea that would make a great movie starring Sandra Bullock. Now if only I could get access to her.


Anyway, back to food.  I hope you enjoy this applesauce cake as much as I did. And I hope, sometime in your lifetime, you can get to New Orleans. The history is so rich!

GLUTEN-FREE APPLESAUCE CAKE

Ingredients:

         1/2 cup safflower oil
         1 cup sugar
         1 egg plus 1 egg white
         1 cup chilled applesauce
         2 cups GF flour
         ½ teaspoon Xantham gum
         1 teaspoon baking soda
         1 teaspoon ground cinnamon
         1/4 teaspoon ground cloves
         1/2 cup raisins if desired
       cream cheese frosting, if desired

  Directions:

Preheat oven to 350 degrees.

Mix oil, sugar, eggs, applesauce. Add GF flour, xantham gum, baking soda, spices (and raisins if desired). Don’t overmix.

Pour into cupcake molds (about ½ to 2/3 full – any more and you have a mess at the top, any less and you’ll have to make do with a wimpy cupcake).

Bake for 18-22 minutes, testing at 18 with a toothpick to see if they are done.

Frost with cream cheese frosting, if desired. * 


CREAM CHEESE FROSTING LINK: [note this is on the same page with Candy Cane Cookies]


* * *

You can learn more about me, Avery, by clicking this link.

Chat with me on Facebook and Twitter.

And if you haven't done so, sign up for my mailing list
 so you can learn about upcoming events, releases, and contests!

And watch for CLOBBERED BY CAMEMBERT, coming out February 2012.


* * * * * * * *


Thursday, January 5, 2012

Bowl Games Quesadilla Recipe


Well, by now you all know that our sweet Elizabeth aka Riley is going to leave us. BOO-HOO!  We will miss her completely, but she will be back for guest appearances. Keep an eye open.

Note: I'll be moving to Wednesdays starting next week.

And for today...

Bowl games. So many it makes my head spin. Does it make yours spin? Do you have lots of folks coming over? Do you need food? I've got some.

Just so you know, snacks for bowl games aren't just for bowl games. They can be made all year long.

This recipe I discovered in the Los Angeles Times food section, and I loved it but tweaked to my satisfaction!

I love the smell of onions cooking. They perfume the kitchen air for days at a time. [On other days, trust me, I like the air perfumed with the aroma of cookies, cinnamon, etc.) But some days, it's that tang, that zip, that onions provide.

I happen to be traveling to a Bowl Game in New Orleans as we speak, and I hope to come back with some fabulous recipe to share in the coming weeks.

In the meantime...


GOAT CHEESE QUESADILLA

Ingredients:

1/3 cup minced onion
2 green onions, chopped
1 pound collard greens (or kale)
1 teaspoon salt
½ teaspoon paprika
2 teaspoons minced garlic
1 cup feta [goat] cheese, cubed
8 corn tortillas
4 ounces Mozzarella, diced
Oil, as needed

  Directions:

Heat 1 tablespoon oil in large skillet. Add the onion and cook on medium low until the onion gets soft, about 3 to 5 minutes.

While the onion is cooking, cut the collard greens in thin strips and rinse in a colander.  Do NOT dry the greens. 

When the onion is cooked, add the greens, salt, paprika, garlic.  Cook on medium low for about 15 minutes, or until the greens are really tender.

Remove the greens from heat and stir in the feta.

On a medium hot griddle, heat 1 tablespoon oil. Use a spatula to spread the oil around.  Because you’re making 8 quesadillas, plan ahead.  This will take some time.  Set as many tortillas as you can on your griddle (flat) and cook the tortillas about 2 to 3 minutes on each side.  Flip and put some of the feta/green mixture in the center.  Dot with Mozzarella, and fold with a spatula. Hold in place until the mixture “sticks.”

Cook until the quesadilla browns, about 2 to 3 minutes and flip again to cook the other side.  Repeat until you have 8 quesadillas.

Serve immediately or you can keep them warm in a warm oven (about 250 degrees).  These also reheat well in a toaster oven (at about 300 for 10 minutes). 


Remember to check out our new recipe collection - the appetizers section to fill out your Bowl Games menu!!


* * *
Also, please note that a bunch of my friends have new cozy  mysteries out this week!!!  Our very own Lucy Burdette (new to the blog) has AN APPETITE FOR MURDER. Yum! 

Our former MLK contributor, Julie Hyzy has AN AFFAIR OF STEAK. 

And please check out Heather Blake's IT TAKES A WITCH (the first in a new series) and Hannah Reed's PLAN BEE.


* * *
You can learn more about me, Avery, by clicking this link.

Chat with me on Facebook and Twitter.

And if you haven't done so, sign up for my mailing list
 so you can learn about upcoming events, releases, and contests!

And watch for CLOBBERED BY CAMEMBERT, coming out February 2012.


* * * * * * * *