Showing posts with label Monument to the Dead. Show all posts

Friday, August 16, 2013

Beating and Whipping Oh My!

by Sheila Connolly

Having road-tested my choppers (and picked my murder weapon), I am now moving on to the second-largest group of items in my recent auction haul: the beaters. [Note: if the history of cookware drives you nuts, just skip ahead to the good part—the recipe.]


Think back to watching your mother (or if you were lucky, your father) make a cake.  Cakes were a big deal in those days, before Betty Crocker et al. took over the universe—I seem to recall the cooks being very concerned that the cake layers would fall while baking, so we children had to tiptoe around the kitchen while they were in the oven, or better yet, go out and play somewhere else.  Maybe the ovens were less dependable in those days, because I don't hear many complaints about fallen cakes nowadays.

Cakes rise while cooking for only a few reasons: one, you include a leavening agent, like baking soda or powder or yeast; or two, you beat a lot of air into the batter, so that when the cake cooks, the air inside the batter expands and voila, the cake swells. Or you combine these techniques.

Now, if you can, think back to a time when there were no electric mixers, either hand or stand. You had to mix things by hand, and that's not easy.

So crafty manufacturers started making hand-operated mixers that took at least some of the work out of it.  No small number of them were made of cast iron, which is why they have survived for over a century (some makers were so proud that they stamped the patent number and the date on the item itself).  And now I have a whole batch of them, in different designs and sizes.  I decided to see what they can do.


 Often these are labeled "egg beaters," some even right on the piece itself, but they were used for mixing a wide range of things.  Cream, logically.  Mixed drinks. Batters. Ice cream. The list goes on.

Being of a scholarly bent, I had to do some research into my wonderful haul,
and to that end I acquired a second-hand copy of Linda Campbell Franklin's book, 300 Years of Kitchen Collectibles (5th ed. 2002), a two-inch-thick tome that includes item descriptions, comments, and even recipes. I have already learned a lot from browsing through it (including the fact that one item in my haul isn't for cooking at all—it's a pot scrubber!).


I wanted to find a recipe of the same era as my new old utensils, to see how well the beaters worked.  Luckily I have a clutch of old cookbooks, so I turned to an older version of the classic Boston Cooking-School Cook Book (aka Fannie Farmer), whose copyright dates range from 1896 to 1951.  What is interesting is that this particular edition straddled the line for mixing:  it offered instruction for both hand-mixing and machine mixing.  In other words, the instruction for using an "electric mixer or beater" were given separately.  I thought I'd play it safe with a simple cake recipe.


Fanny Farmer's Butter Cake

This is a basic and versatile cake. You can add almost anything—chocolate chips, currants or raisins, honey, cinnamon or nuts.

I made this with no modern appliances (unless you count the oven!)

1 3/4 cups cake flour

1/2 tsp salt
2 tsp baking powder
1/3 cup butter, softened
1/2 tsp vanilla
1 cup sugar
2 egg yolks
1/2 cup milk
2 egg whites


Preheat the oven to 375 degrees.  Grease your pans (or if you're making cupcakes, you can use paper liners).

Sift the flour, salt and baking powder.

Cream the butter thoroughly. Add the vanilla.  Add the sugar gradually and beat until fluffy.  Add the egg yolks.

Stir in one-half cup of the flour mixture, then one-quarter cup milk, then add the rest of the flour and milk.


Beat the egg whites until they are stiff but not dry, then fold them into the batter (by hand).

It worked!
Bake cupcakes for 20-30 minutes.  If you're making a cake, bake layers as you would the cupcakes; in a loaf pan, bake at 350 degrees for 30-45 minutes.


Oh, and then there's the whipped cream:


Behold:  whipped cream!  And fast!


My final assessment:

--cooks in 1900 had to work hard!
--they had time to master the
  techniques for using the tools, which I didn't
--some of the tools work better than
  others, but the successful ones may not be the ones you expected
--the cream whipper worked really well!
--there was some real pressure to clean up as you went, because if you let metal tools sit, they rust

It was fun.  Will I do it again?  Maybe.  I still have a few interesting pieces to play with, including a mandoline-like thing that may be for making cole slaw. But it could be hard on unskilled fingers! And a hand-turned rolling pin.  And two butter presses--don't you think butter should be pretty?


Friday, August 9, 2013

My New Old Treasure

by Sheila Connolly

Our town is home for an auction house, which holds auctions of miscellaneous junk at the Rotary Club hall every few months.  The types of item vary widely, both within and between auctions. For a while they had a lot of Nazi militaria (which seldom sold at all), and a few months ago there was a row of five or six nice mahogany chests of drawers.  You never know what you'll find.


Last week I went to the preview, and the first thing I encountered when I walked in was a table full of antique cooking utensils.  Like someone had entered a time warp and grabbed everything small from a Victorian kitchen:  choppers and egg-beaters and poachers and butter molds and a bunch of things I can't even identify.  It was all one lot, of 51 pieces.  And I wanted it.

I went to the auction; I bid; I won (even within the dollar limit I had set myself).  I am now the proud owner of a hodgepodge of antique (not vintage, nope—older than that) cooking items.  And I plan to try them all out.

Round one:  the choppers (note: there were no knifes in this collection).  An even dozen, all different.  Or maybe thirteen, if you could the strange bell-shaped one.  I think they're gorgeous—hand crafted, with lovely wooden handles.  So of course I had to find out how they worked.  Guess what:  they work just fine, and each one works a little differently.

Confession:  when I first looked at the lovely array of sharp-edged tools, my immediate thought was, "what great murder weapons!" I'll be testing them with that in mind.  They fit so nicely in my hand, and I just sharpened them…

Okay, back to the real world. I set myself the task of chopping the onion for today's dish:  stuffed squash.  What can I say?  They had cute, stripey locally-sourced pattypan squash at our market, and I had to take them home.  They make a pretty presentation, and the stuffing could be used in a wide variety of vegetables—peppers, or even onions.  Anything that starts out hollow or that you can hollow out without the vegetable collapsing.


Stuffed Squash 
(this filled four small squash, but you can multiply the recipe)

1 small onion, chopped

1 Tblsp butter
1 clove garlic, minced or pressed
1/2 lb sausage
1/2 cup white bread crumbs, soaked in milk
Fresh thyme (or other herbs)
Salt and pepper
1/2 cup grated Parmesan cheese


Preheat the oven to 400 degrees.  Slice the smaller end off the squashes and hollow them out with a melon baller or small sharp spoon (try not to pierce the skin).  Place in a lightly oiled baking dish.


Melt the butter in a skillet over medium heat.  Add the onion and garlic and saute until tender, about 3 minutes. Place in a large bowl and let cool.

When the onion mixture is cool, add the sausage, breadcrumbs (drain off the excess milk), herbs, salt, pepper and cheese.  Mix (hands work well for this!).


Fill each of the hollow vegetables with the mixture.  Stand them up in the baking dish and sprinkle a little more oil over the top.

Bake for 30-40 minutes (length of time will vary depending on how large your squash or vegetable are—you want to be sure the pork sausage is thoroughly cooked).


These can be served hot or warm (so can be made ahead).


Next time:  the six antique egg-beaters!


Friday, August 2, 2013

Marinated Broiled Eggplant

by Sheila Connolly

Our tiny local farmers market is finally in full swing, and will stay open until October or the veggies run out, whichever comes first.  A week ago I had the last batch of peas from a nearby organic farm, and they were lovely.  I grew up in an era that celebrated BirdsEye frozen vegetables, so I didn't know the pleasure of peas only hours away from the farm.  Yes, you still have to put in some time shelling the peas, but there's something soothing about it, and it's nice to be part of a long tradition.

Anyway, the peas were gone this past weekend, the corn is doing well, and one booth had a batch of Japanese eggplant.  I said, "I want them all!" (Don't worry—it was only a pound.) 


Now, what to do with eggplant…  Again, something I didn't grow up eating (I was a picky eater as a child and wouldn't touch a tomato, so eggplant wasn't an option).  I've come up with a variety of recipes, including one for Mystery Lovers' Kitchen for eggplant pizza that surprised me.  But I'm happy to try new recipes, and I found one with an oriental flair that worked well with, yes, Japanese eggplant. 

While it does involve a broiler, it doesn't take long so you won't heat up your kitchen.  I don't think you could substitute a barbecue grill, but it might be worth a try.


Marinated Broiled Eggplant

1 pound eggplant (you can use one large one or several small ones)

2 1/2 Tblsp soy sauce
1 Tblsp lemon or lime juice
1 Tblsp honey
1 clove minced/pressed garlic
1 tsp grated fresh ginger (peeled if you like, 
     and I also added more than a teaspoon!)

Vegetable oil for pan

Whisk together the soy sauce, juice, honey, garlic and ginger.  Pour into a glass baking dish or large non-metallic bowl.

Trim the ends off the eggplant and slice 1/8" thick.


Toss the eggplant slices (carefully, so you don't mangle them) in the marinade.  Cover and let sit for at least 20 minutes, but not more than one hour (you don't want them to get too soggy), turning at least once.


Preheat the broiler.  Brush the rack of a broiler pan (I covered mine with foil—less cleaning) with oil and distribute the eggplant evenly.  Broil 5-7" below the flame (probably the upper rack in your oven) until tender and slightly browned, maybe 10 minutes. (Note:  Adora has not one but two broiler heats! I used LO to cook the eggplant, and HI to brown it off a bit.)


It makes a tasty side dish for grilled meat or fish. Served here with chicken and couscous.


Sunday, July 28, 2013

Blue Cheese Potato Cakes

by Sheila Connolly

I thought I was done with Irish recipes for a bit, but I keep finding good ones—as I keep saying, Irish cooking had gotten a lot better in the past decade or two. This one you might call a new classic: it uses potatoes (which the Irish have been doing well for a couple of centuries) and blue cheese (there are a lot of dairy farms in Ireland—my great-grandfathers in Co. Cork raised cattle), but it adds a nice mix of herbs and garlic to punch up the flavor.

BLUE CHEESE POTATO CAKES

1 1/2 - 1 3/4 pounds baking (you want a mealy potato, not a waxy one) potatoes,

   peeled and cut into 2" pieces
   (note: this recipe makes 12+ cakes,
   So feel free to reduce it)

2 Tblsp unsalted butter
2 Tblsp fresh chives, minced
1 Tblsp garlic, minced
1/4 tsp nutmeg (if you like)
salt and pepper to taste
2 Tblsp fresh dill, minced
2 Tlbsp fresh parsley, minced

1 cup (4 oz. by weight) blue cheese, crumbled
1 egg yolk


1 cup flour
2 eggs, beaten with 1/2 cup milk
1-1 1/2 cups bread crumbs or panko
oil for cooking


Cook the potatoes in salted boiling water for 12-15 minutes, or until tender. Drain and mash.

In a small skillet, melt the butter over low heat.  Cook the chives and garlic for 1-2 minutes, until soft. Stir into the mashed potatoes. Stir in the nutmeg, salt, pepper, dill and parsley.  Cool completely.


 Stir in the cheese and egg yolk (leave the cheese lumpy).

Shape the mixture into 12 cakes.  Refrigerate on a sheet of waxed paper or foil for 10 minutes.

Dredge the cakes in flour, then coat with the egg mixture, followed by the bread crumbs or panko.


Heat the oil in a large skillet.  Add the cakes and cook for 3-5 minutes per side, until browned. (You can cook them to this point then reheat them for serving.)


Serve with a dollop of sour cream if you want

.

Friday, July 12, 2013

What Do You Do with a Baby Kohlrabi?

by Sheila Connolly

It's hot.  As I write this, we're in the midst of our second heat wave of the summer, and there's more to come.  So of course my thoughts turn to a meal that involves NO COOKING.

And then I went to the farmers' market again.  They were out of nettles this week, but I stopped at one stand and found…baby kohlrabi. 

I don't know how many of you have ever prepared kohlrabi.  It's a member of the cabbage family, and the part you eat is really a swollen part of the stem, near the ground, about the size of a softball (at least when you find one in a store).  It comes in green and purple, although the interior is the same in each. It's sort of crunchy, and tastes kind of like a turnip—rather earthy.  It can also be tough, so it's best to cook the big ones, after peeling them.

But, the baby ones are so cute! I made the seller very happy when I actually recognized the ones she had, picked that morning.  They were adorable! (What is it about tiny vegetables that is so appealing?) I bought six of them, and then she sold me some mint and two bunches of baby carrots, all for $5, and we were both happy. (I think I may be getting an odd reputation at the farmers market.)

Now to make a no-cook meal with baby kohlrabi and baby carrots.  Luckily I had half a grilled chicken waiting in the fridge (there are only two of us at home, so if I buy a whole chicken, split it and grill it, we get two meals out of it), so I diced that up. 


Then I julienned those kohlrabi (I figured they were small enough to eat raw),


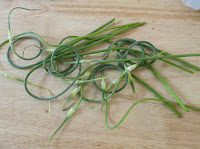
and sliced the carrots, and chopped some parsley. I still had those garlic scapes from last week's farmers market, so I diced up a couple of those too 


(watch out—even the little skinny ones are surprisingly garlicky, so use them sparingly unless you really, really like garlic). Heck, you can add whatever you like. Snow peas. Tiny green beans. Whatever you've got that's fresh. And you'll notice I mixed up the shapes, textures and colors in this—you want it to look pretty too.


Recipe? You want a recipe?  If you insist. This amount made a nice light dinner for two of us.

2 cups cooked chicken, diced
3 baby kohlrabi, peeled and julienned
1 bunch baby carrots, sliced
3-4 small garlic scapes (use only the smaller end—the thicker part can be tough)
Parsley, chopped

Dressing:

1 cup mayonnaise (I'm not going to insist you make your own)
1 tsp grated horseradish
1 tsp lemon juice
Salt and pepper to taste

Just mix it all up and taste it.  If it lacks oomph, add some herbs and spices.  I threw in a dash of turmeric, because I thought the earthy flavor would go well with the kohlrabi. I also thought it came out a little thick, so I threw in a dash of vinaigrette to smooth it out.

When you're ready to eat, place your ingredients into a large bowl, then add the dressing and toss lightly to cover.  On plates or shallow bowls, lay out some lettuce (I used Boston lettuce because I like the shape of the leaves) and scoop the chicken salad over it.  Serve!


If you're really hungry, you can include some nice crusty bread on the side.  If it's too hot to be really hungry, you're all set!

It's supposed to go below ninety this week.  I hope.


Friday, July 5, 2013

STINGING NETTLES!

by Sheila Connolly

(Bet you never thought you'd see a recipe for nettles!)

I really thought I was done with recipes from my travels, but then the universe decided it had other ideas.

I went to our town farmers' market this weekend.  It's been a hard year for farmers all over—too hot or too dry or too wet.  So there were only three stalls selling vegetables this time around—and one of them had stinging nettles.  I may have mentioned that at the banquet in a castle last month (was it really a month ago now?) we had ravioli with ricotta-nettle filling, and I figured that was my once-in-a-lifetime opportunity to try nettles.  And then there they were at the market, just waiting for me.  Of course I bought them.

There aren't a lot of recipes out there for stinging nettles.  None in my cookbook collection.  None on Epicurious.  So I did a Google search—and came up with three.  One was for soup, one for ravioli (much like those I had already eaten), and one was for a sort of pesto-ish sauce for pasta.  I picked Door Number Three—largely because for some unexplained reason I actually had all the other ingredients called for, including sorrel, which has gone to seed and taken over my garden.  The stars aligned: this was meant to be.

Fresh nettles!

One important note:  Do not handle stinging nettles barehanded, because they (duh) sting. Use gloves, or just dump them into boiling water without touching the leaves.  Once they've cooked for a couple of minutes, they're safe to handle (get rid of the water, though). Oh, and safe to eat.  No burning sensations, no tummy rumbles or heartburn. Really. They don't even taste strong.


Pasta with Stinging Nettle Sauce

Ingredients:

1/4 pound fresh stinging nettles 

     (I used less because that's all I had)
8 ounces pasta
1/2 cup extra virgin olive oil
1/4 pound fresh ricotta cheese
1 lemon for zest and juice
1 tablespoon fresh mint, chopped
1 tablespoon fresh parley, chopped
1 tablespoon fresh chives, chopped
Salt and pepper, to taste
1 small handful of fresh sorrel leaves, washed and 
     torn into bite sized pieces
1/2 cup toasted walnuts, chopped


In a large pot, bring salted water to a boil. "Carefully" add the nettles (no bare hands!) and give them a stir. Cook for 5 minutes and transfer them to a colander with a slotted spoon. Let the nettles drain. Dump the water out.


Boil another pot of salted water, add your pasta, and cook until al dente.
While the pasta is cooking, press most of the water out of the nettles with the back of a spoon, transfer them to a food processor and puree. Drizzle in the olive oil and process until completely smooth. Add the ricotta, lemon zest and juice and herbs. Pulse the processor to blend all the ingredients. Add the chopped walnuts last and pulse a couple of times.


Taste, then season with salt and pepper.
Remove a cup of the water the pasta is cooking in and reserve. Drain the pasta and then return it to the pot. Toss in the nettle-ricotta cheese mixture and stir to combine. Add the fresh sorrel and a little of the reserved pasta water to create the desired consistency of the sauce.

 Enjoy! (Don't worry--it won't bite!)


Friday, June 21, 2013

Italy Again

by Sheila Connolly

I'd love to write a post about gelato.  I adore gelato, and I made of point of trying as many new kinds as I could this past month.  Green apple gelato is lovely, as is melon (limone—meh).  Nociolla (hazelnut) still reigns supreme.

I took many, many pictures of gelateria, wherever I found them, which was basically everywhere.  But, alas, I will not try to make my own gelato.  I'm sure it's possible, but I'd rather let the experts do it and cherish the memories.

But! At the Tuscan villa where we stayed for the first part of our trip, I met my first panna cotta.

I've heard the term before, but if I ever looked at a recipe, I was probably put off because it includes gelatin.  I don't do gelatin.  I know, it's kind of odd since I grew up with Jell-O, in all its glory. (And Junket Rennet Custard, which still makes me gag—what was up with that?) I guess I'd have to say that when I hear "gelatin" I think of chewy rubbery glop.

Luckily the dessert that appeared before us at the villa did not have a name attached.  It was a pure white half-sphere, garnished with fresh berries.  It was light and airy and sweet, the just the right size to finish the meal.  It was only after everyone had inhaled it that the term was whispered, ah panna cotta…

It's easy to make.  It matches well with everything—fruit, chocolate, caramel.  And it can be made ahead of time if you're entertaining, and you can dress it up to look pretty.  It may be the perfect dessert, particularly in summer.  After gelato, of course.


Buttermilk Panna Cotta


1 1/2 tsp unflavored gelatin*
3/4 cup heavy cream
1/3 cup sugar
1 1/2 cups buttermilk
1 tsp vanilla

In a small bowl, dissolve the gelatin in 1 1/2 Tblsp water (room temperature).  Let it stand until the gelatin softens (it will swell up as it absorbs the water), a few minutes.

In a small, heavy saucepan, combine the cream and the sugar.  Stir over medium-high heat until the sugar dissolves and the mixture barely begins to simmer (do not boil!).  Remove the pan from the heat and stir in the gelatin.  Let the mixture cool, stirring occasionally, until it is just warm.  Stir in the buttermilk and the vanilla.  Pour into six half-cup ramekins or molds (note:  the size of the container is not critical, nor is the material, although it is easier to unmold them from a metal mold).

Cover and refrigerate until set, at least four hours.  Longer, even overnight, won't hurt.

I was experimenting with different molds

When you're ready to serve, run a sharp thin knife around the edges of the molds and invert them over a plate (in a perfect world they will pop out neatly).  Garnish with whatever you like.


*I found this lovely little measuring device at the book/cookware story Salt & Pepper, recently located in Occaquan VA, now in National Harbor MD (near Alexandria VA).  It will measure in any number of units, wet or dry, and it's convenient for odd amounts.  For example, the gelatin required for this dish was more than one packet but less than two, but I had the answer in hand!