Showing posts sorted by relevance for query two ingredient dough. Sort by date Show all posts

Saturday, October 15, 2022

Pita Bread from Two Ingredient Dough #Recipe by #PegCochran/Margaret Loudon


I told you about two ingredient dough here.   It's basically one cup of self-rising flour to one cup (or slightly less) Greek yogurt.   I usually make bagels with it but my daughter said she'd made pita bread and it came out great.  I was making Greek turkey meatballs for dinner and I thought some homemade pita bread was just what the meal needed.  These don't puff up as much as a regular pita but they were still very good with just the right amount of "chew" to them.


Ingredients:

1 cup self-rising flour
1 cup Greek yogurt (fat free is fine)
Oil--I used olive oil but canola oil would work as well


Directions:

Combine the flour and yogurt.  I usually use my food processor for this and run it until the dough begins to form a ball.  The dough may be sticky.


Flour your work surface and your rolling pin.  Separate ball of dough into four equal pieces.  Form into a ball and roll out into a disc--as near to a circle as you can get.  I like to think that the slightly off shape makes them look more "homemade!"


Brush a frying pan (cast iron if you have one) with oil and heat over high heat.  Add pita discs one at a time and fry until the first side starts to brown in spots.  It doesn't take too long so keep an eye on it.  Flip the disc over and brown the other side. 


Remove from pan and keep warm covered with a kitchen towel or place in a low oven.  Continue with the remainder of the discs.

Serve and enjoy!


Cranberry Cove #7 is finally here! 


Monica's stepmother wakes up next to a dead man!  Did she do it?


Amazon

Barnes & Noble


An unscrupulous realtor pays the ultimate closing costs in the new Cranberry Cove Mystery from USA Today bestselling author Peg Cochran!

Autumn is settling in on Cranberry Cove, but things are starting to heat up when Monica’s stepmother shows up at her back door gripped by panic. Gasping out an explanation, she tells Monica she’d been dozing in her realtor’s car when he was shot dead. Refusing to alert the police for fear that the killer will target her next—or that the police will consider her their prime suspect—Monica’s stepmother goes mute, and Monica decides to track down the culprit herself to clear her name and keep her safe.

Finding the killer won’t be so easy, though, as the victim had run afoul of buyers, sellers, and even other realtors at one time or another, and it seems that nearly everyone in the small town had a reason to want him dead. Even more puzzling is that the deeper Monica digs into the background and final days of the victim, the more the clues point to her stepmother. Then a second body is found, and Monica realizes she’s going up against a devious killer who will stop at nothing to put everyone involved out of commission . . .


Saturday, June 15, 2019

Two Ingredient "Bagels" #Recipe @PegCochran


As I've mentioned in my previous posts, I've been doing Weight Watchers for awhile now. (Down 
13 lbs.!)  I've found it fairly easy to adapt many regular recipes to be lower in "points" -- use less oil or butter, sub ground turkey for ground beef, etc. One recipe I did get from WW (although it's available on a lot of cooking sites) is the two ingredient dough.  Most people use it to make bagels, but you can also make pizza crust and other things with it.  They don't taste *exactly* like bagels but are tasty enough that my hubby eats two at a time and I've taken to doubling the recipe when I make them.  I got "Everything Bagel Seasoning" at Trader Joe's to top them with (I gather it might also be available at Walmart) although you can top them with anything you want--sesame seeds, poppy seeds, cinnamon and sugar, etc.  

The recipe calls for one cup of flour per one cup of Greek yogurt.  I've found that the dough is very sticky if you use a full cup of yogurt and I've taken to reducing it to 3/4 cup.  It mixes most easily in a stand mixer, but you can mix it by hand as well. 

* These are 3 WW Freestyle points

Bagels:


¾ to 1 cup self-rising flour
1 cup fat free Greek yogurt
1 egg
Seasoning of your choice


To make self-rising flour:


Sift together 1 cup flour per 1 ½ teaspoons baking powder and ½ teaspoon salt.


Combine self-rising flour and yogurt and mix into dough.  Knead on floured board or counter until dough is well combined.   

Pat into a circle and divide into four pieces.  *Note I doubled the recipe to make eight bagels.


Form each piece into one bagel:  roll into a ball and make a hole in the center with your thumb. Gradually enlarge hole until voila! You have a 
bagel.


Brush with beaten egg and sprinkle with seasonings of your choice.   


Bake in a 350 degree oven on a parchment lined cookie sheet.  Timing varies but check bagels after 15 minutes.  They should be golden brown on top. Depending on your oven and the size of your bagels, they may need five to ten minutes more.


We enjoyed them toasted and topped with smoked salmon and cream cheese!  


An intrepid 1930s Manhattan socialite uncovers deadly secrets during an assignment to the Hamptons in this riveting historical cozy mystery for readers of Victoria Thompson, Anne Perry, and Rhys Bowen.


Westhampton, 1938. To the dismay of her well-to-do family, Elizabeth “Biz” Adams is quickly establishing herself as a seasoned photographer over at the Daily Trumpet. Growing more confident in her decision to pursue a career, Elizabeth is thrilled when she and her reporter sidekick, Ralph Kaminsky, are sent to Long Island to cover the story of a young maid found dead in one of the glamourous summer homes in the devastating aftermath of the Great New England Hurricane—also known as the Long Island Express.

At first it’s assumed that the young woman was caught in the terrible storm, but when a suspicious wound is found on the side of her head, the police suspect murder. The maid’s death becomes even more tragic when it’s discovered she was pregnant, and with Elizabeth and Kaminsky at the scene of the crime, the Daily Trumpet scoops all the other papers in town.

The young woman’s boyfriend emerges as the likeliest suspect. But as Elizabeth follows the story, she begins to wonder whether someone in the household of the maid’s employers might be responsible—someone who’ll stop at nothing to keep the truth about the baby’s paternity hidden.


Monday, April 17, 2023

Sweet Cheese Pierogi by Maya Corrigan #Recipe

Holiday dinners in my family always featured a dessert of pierogi, Poland's iconic dish. The crescent-shaped dumpling can be stuffed with almost any food--vegetables, cheese, meat, fruits--but the sweet cheese version was the favorite in our family. My grandmother and my aunt made a filling of farmer’s cheese, but that’s hard to come by where I now live. Lacking that, we’ve used ricotta or dry curd cottage cheese. Today I'm sharing a pierogi recipe that my children improvised, using mascarpone as the filling. It turned out delicious.

There are as many different recipes for pierogi dough as there are possible fillings. For all of them you can add additional flour and water as needed to make the dough workable. 

Dough Ingredients

2 1/2 cups of flour
1/4 cup full fat sour cream
1 egg
1/2 teaspoon salt
1/2 cup warm water (more or less), added as needed to make the dough workable


Cheese Filling Ingredients

1 cup mascarpone, ricotta, or farmer’s cheese
1 tablespoon of sugar
1 teaspoon fresh lemon juice
1 teaspoon vanilla extract
[1 beaten egg if the cheese is dry, not needed for mascarpone.]

Plus butter (or oil) for browning the finished pierogi.  


Ingredients for sweet cheese pierogi
Oops! I left out the lemon in this photo


Combine the ingredients for the dough in a large mixing bowl and stir together with a fork or with your hands until the dough comes together. Add additional flour if the dough is very sticky and water if it’s too dry. Once you can form it into a cohesive ball, remove it from the bowl. Transfer it to a floured surface and knead it for 5 to 10 minutes. After kneading, the dough should be smooth and only slightly tacky. Let the dough rest for 30 minutes, covered with plastic wrap. 


While the dough is resting, make the cheese filling by combining all the ingredients. 

Divide the dough into two pieces and roll out one piece at a time, keeping the other half covered. On a lightly floured surface, roll the dough to a maximum of 1/8-inch thick (or less). The thinner the better. Then cut rounds 3-4 inches in diameter with a floured glass or cookie cutter. This recipe does not tell you the number of servings because that will vary depending on the size of the rounds you cut.  

Put a level tablespoon of cheese filling in the center of the round. Don't stuff it too full or you won't be able to close the pocket. Moisten the edges with water and fold it to make a half-circle. Then seal it by pinching the edges with your fingers or a fork. Set the pierogi aside on a floured towel. Continue to fill each round until you have used all the dough.


Transfer the pierogi into lightly salted boiling water in a large pot. Don't overcrowd them because they expand as they cook. When they rise to the top, they are cooked. Use a slotted spoon to take them from the pot and set them on a buttered plate or wax paper until they are less wet.

Melt butter or pour oil in a skillet until its surface is covered. Fry the pierogi in the pan until golden on each side. 


Serve the pierogi with a dollop of sour cream and/or jam. The plate in the photo below comes from a set that belonged to my grandmother and, after she passed away, to my aunt--the two women who made the best sweet cheese pierogi ever. The hands shown in the above photos belong to my son, my daughter, and my daughter-in-law. I'm proud that they're continuing the family holiday tradition.   


Do you have a family dish that you remember fondly? 


📚

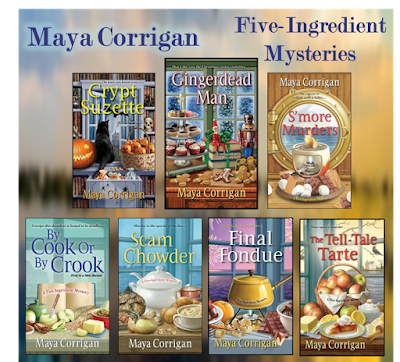
Maya Corrigan writes the Five-Ingredient Mysteries featuring café manger Val and her live-wire grandfather solving murders in a Chesapeake Bay town. Maya lives in a Virginia suburb of Washington, D.C. Before writing crime fiction, she taught American literature, writing, and detective fiction at Northern Virginia Community College and Georgetown University. When not reading and writing, she enjoys theater, travel, trivia, cooking, and crosswords.


Visit a mystery fan fest in the latest Five-Ingredient Mystery


Val and Granddad attend a mystery fan fest that features a bake-off between contestants playing the roles of cooks to fictional sleuths. As Nero Wolfe’s gourmet chef, Granddad competes against Sherlock Holmes's landlady Mrs. Hudson, played by Cynthia Sweet. Granddad blames her for ripping off the five-ingredient theme of his Codger Cook newspaper column to use in her own recipe column and cookbook. When she’s found dead in her hotel room with a whistling teakettle next to her, he and Val sort through the festival-goers to find the one with the biggest beef against Ms. Not-So-Sweet.


📚


Tuesday, May 21, 2013

Blueberry Hand Pies with a Secret Ingredient from Culinary Mystery Writer Cleo Coyle


Blueberries as big as the end of your thumb, 
Real sky-blue, and heavy, and ready to drum 
In the cavernous pail of the first one to come!

~ Robert Frost


With blueberry season nearly upon us here in New York, I thought this recipe might come in handy. (Yes, "handy" as in hand pies. Hey, no groaning. You can't expect a cozy writer to ignore a pun like that, can you?) 


So what’s with this promised "secret" ingredient? Well, I’ll tell you, it’s not in the filling, which I’ve kept very simple. The secret ingredient is in the homemade crust.


Question: Hey, wait a second. Didn't you already
post 
a pie crust recipe with a secret ingredient? 

Answer: Good memory.


No, vodka is not today's
secret ingredient. So what is?
Scroll down...
A few months ago, I blogged about my take on the famous America's Test Kitchen pie crust recipe that called for vodka. If you missed that recipe and my geek-speak explanation on (a) why a vodka pie crust works and (b) what I do to make the recipe work even better for me, simply click here to read the post and get the recipe.

So what is today's secret ingredient if it's not vodka? Find out in my recipe notes below and, if you bake it, I sincerely hope you will… 

Eat with joy 
~ Cleo


Blueberry
Hand Pies


Cleo Coyle is author of
The Coffeehouse Mysteries
While the famous "vodka pie crust" recipe is one of the best crusts that can be made in a pie pan, it's not the perfect crust for every pie. For one thing, it's far too fragile to work well in a hand pie (aka turnover or pocket pie). 

Below is the recipe I use when I have a hankering for hand pies. The crust is tasty and tender, but it's also strong enough to hold together for a pan-free pie. 

As you can see, my "secret ingredient" is yogurt, which accomplishes a few things in the recipe. It slightly reduces the amount of butter and shortening thus reducing the calorie count a bit. It makes the dough easier to work with. It also boosts the crust’s flavor. The slight tanginess of the yogurt offsets the heaviness of the butter and shortening and creates a crust with a brighter flavor, one that especially complements the taste of a fruit pie. 


To download this recipe in a PDF format that you can print, save, or share, click here.


Cleo Coyle's 
Yogurt Pastry Crust


Makes 6 or 7 hand pies, depending on size and crust thickness

Ingredients:

2 cups all-purpose flour

1/2 teaspoon kosher salt

1 Tablespoon sugar

1 stick (1/2 cup) unsalted butter, very cold

1/4 cup (4 T) solid vegetable shortening (e.g. Crisco), cold

2 large eggs

1 Tablespoon water

1/4 cup plain regular yogurt - full-fat yogurt is best
     (low-fat is okay to use, but do not use nonfat yogurt)


Step 1 - Sift flour, salt, and sugar into a bowl. Cut butter into small slices, add solid shortening and use fingertips or pastry blender to work the fats into the flour. (Or pulse mixture in a food processor.) When the mixture resembles coarse meal, place the bowl in the refrigerator to keep cold


 Step 2 – Measure out the yogurt and place in a small bowl. Into a separate small bowl, crack two large eggs, add the 1 T. of water, and whisk vigorously until well blended. Measure out ¼ cup of this egg-water mixture and combine it with the yogurt. Using a fork, vigorously whisk the yogurt and egg-water mixture until blended and smooth. (Reserve the remaining egg-water mixture for brushing crust before baking.) 

Step 3 - Remove the bowl with the flour mixture from the refrigerator. Add the yogurt-egg mixture and stir with a spoon, rubber spatula, or your hand until a smooth dough forms. This dough will be sticky. That’s okay! Shape it into a ball, wrap it in plastic and place in the refrigerator for 1 to 2 hours. The dough will be less sticky, easier to work with, and because it’s well hydrated, you can use flour as you roll it out and the dough will stay tender. When ready, lightly flour a flat surface and your rolling pin and roll out and bake according to pie or tart recipe. 

2 TIPs: Always keep pastry dough COLD. Roll hand pie crusts one at a time and keep the rest of the dough in the fridge. Place all formed pies back in the fridge for ten minutes before baking. If you bake the pies cold, they will have even flakier crusts.

To Make Hand Pies

Mix the filling: Gently mix 2-1/2 cups fresh or frozen* blueberries with 1 tablespoon flour and 2 tablespoons sugar (more sugar if berries are tart). Toss with 1/2 teaspoon ground cinnamon. Set aside.

*Fun update - Thanks to Libby, one of our blog's followers, I tried the recipe with frozen blueberries and it worked beautifully. No need to thaw frozen berries, but be sure to toss them with the flour to absorb the excess juice during baking. If you need a gluten-free option other than flour, use cornstarch.


Make the pies: To make the pies, break the chilled pie dough into 6 or 7 even pieces and lightly roll these pieces into balls. One at a time, flatten each dough ball into a disc. Lightly flour a rolling pin and roll each disc into a wider circle. Dough can be rolled thin, down to about 1/8-inch, but no thinner or the pie may break while baking. Mound a small amount of the blueberry mixture into the lower half of the circle. Wet your finger with water and run it along the outside edge of the circle. Fold the circle over the filling and seal the pie by pressing down the edges with a fork. Trim ends with a pizza cutter or knife. Brush with the egg wash you made as part of the Yogurt Pastry Crust recipe. Sprinkle with sugar if you like.


Bake on parchment paper: Place a small venting slice in the top of each pie. CHILL the pies before baking and your crusts will turn out even flakier (simply pop them in the fridge for 10 minutes.) 

Bake the pies on a baking sheet that's been covered with parchment paper (do this for 2 reasons). The pies may leak blueberry juice and the paper will catch this mess. The parchment paper also provides a bit of a shield from the direct heat of the pan so the pies will bake more evenly and are less likely to over-brown or burn in places. Bake time 15 to 20 minutes, depending on your oven and thickness of the crust. Bake temperature 375 degrees F. in an oven that's been well preheated for at least half an hour. The combination of a very hot oven and cold pastry dough helps produce a flakier crust.


Sweet White Drizzling Glaze

This is the same simple, sweet glaze I used on my mini cranberry pastries. Click here to get that recipe. Just drizzle the glaze on the finished, cooled pies and you're ready to...


Eat with joy!
~ Cleo Coyle

New York Times bestselling author of
The Coffeehouse Mysteries


Yes, this is me, Cleo (aka Alice). 
Friend me on facebook here.
Follow me on twitter here
Visit my online coffeehouse here.


To view the
Coffeehouse Mystery
book trailer, click here.


The Coffeehouse Mysteries are bestselling
works of amateur sleuth fiction set in a landmark
Greenwich Village coffeehouse, and each of the
12 titles includes the added bonus of recipes. 
To learn more, click here. 
 

The Ghost and
Mrs. McClure


Book #1 of 

The Haunted Bookshop
Mysteries
, which Cleo writes
under the name
Alice Kimberly

To learn more, click here


Monday, December 19, 2016

The Great Sugar Cookie Adventure


To me, sugar cookies are part of Christmas. My mom always made them, though (shh, don't tell her) they were never my favorites. She topped them with an egg wash and a sprinkling of nonpareils. The egg wash made them shiny and yellow, which just never appealed to me.

Many years ago, I went in search of a sugar cookie recipe that I liked. I tried all kinds of recipes. With sour cream, with lemon, with various extracts, but none were to my liking, so I made up my own recipe and liked it a lot.

But in recent years, that recipe has been giving me fits, so I went on another search for a recipe. Tada! I found one that claimed to be the best sugar cookie recipe. And it was almost exactly like mine! There were 3 differences in ingredients. They used lemon and almond flavorings, which I knew I didn't want. (I'm a purist about sugar cookies.) But there was one extra ingredient that I hadn't considered: 2 ounces of cream cheese!

There was also a little twist on refrigerating the dough that I had seen and used before but had forgotten about. Oh my gosh. It worked beautifully and made cleanup so easy! You roll out the dough between two pieces of parchment paper and then refrigerate. It's a beautiful plan because you don't need any extra flour. And you since you work on the parchment paper, in the end you just wad it up and throw it away. No mess!

When you plan to bake these, take the butter out of the fridge to soften way ahead of time. If you forget, then cut each stick of butter into small cubes to speed up the softening process. 

Now, about that pesky icing. I have never had any success with outlining the cookie and then "flooding" it with icing. (Sigh.) So I read a few blogs about it and it seems like everyone does basically the same thing. So I tried.

Warning: do not plan to do this on a busy day. Don't think you can run home from work and ice the cookies for your kid's event that night. This is a lazy day project that took me hours. It's sort of addictive, actually.

When I was shopping earlier this year, I bought a bunch of sprinkles in anticipation of making these cookies. So I didn't use five different colors of icing. I took the lazy way out, used only white icing, and let the sprinkles bring the color to the cookies. For some reason, I was in a white and gold mood, so I made a lot of those and just a few red ones for friends who will like them.

But Krista, you say, where are Santa and Frosty? Hmm, good question. I'm planning to take some of these to the vet clinic where I spend way too much time and all of my money, but I think it goes to show that almost any cookie shape can add fun to the holidays? That's my theory anyway!


Sugar Cookies

3 cups flour
1 1/2 teaspoons baking powder
1/2 teaspoon salt

1 cup butter, softened
2 ounces cream cheese
1 cup sugar
1 large egg
1 teaspoon vanilla extract

Take the butter out to soften.
Whisk together the flour, baking powder, and salt in a bowl and set it aside.

Cream the butter with the cream cheese until blended. Add the sugar and continue beating. Add the egg and beat. Add the vanilla and beat. On a low speed, add the flour mixture about 1/2 cup at a time. When the flour is in, beat to mix.

Divide the dough in 2 and make two balls out of it. Lay one ball on a sheet of parchment paper. Cover with another sheet of parchment paper and roll out the dough. Don't go too thin or the cookies will be difficult to handle. 1/4 inch is about right. Repeat with the second ball of dough. Place both on a flat tray and refrigerate for 1 hour.

Preheat oven to 350 and cover a cookie baking sheet with parchment paper. Remove one sheet of dough from the fridge. Cut out your cookies and place on the baking sheet. Bake for 8 - 12 minutes depending on thickness of the cookies. Roll the scraps into a ball, place between the pieces of parchment paper and roll out again. Place in fridge while you use the other sheet of dough. Repeat until all dough has been used.

Allow cookies to cool for 5 minutes before moving to a baking rack to cool. When cool you can ice the cookies or stack them in an airtight container and ice them the next day.

Sugar Cookie Icing

2 cups powdered sugar, plus extra
3 tablespoons milk, plus extra
1 teaspoon vanilla
warm water (1-2 teaspoons as necessary)
sugar pearls, nonpareils, sprinkles, colored sugar

Material

Wilton number 2 tip
Condiment dispenser bottle or Wilton number 4 tip
tweesers
toothpick or bamboo skewer
1/4 teaspoon measuring spoon

Step One

The objective is to make two thicknesses of the same icing. One will be used to outline the cookie and the other will be used to flood the top of the cookie.

Place the powdered sugar in the mixing bowl with 2 tablespoons milk. Mix. Add one more tablespoon of milk. It should now be almost usable. If it's too dry, add 1/2 teaspoon warm water and mix. It should hold its shape but be soft enough to push through the number 2 tip. Fit a disposable icing bag with the number 2 tip and add a little of the icing. If you find it's too thick to push through comfortably, add drops of the water and mix again.

The best thing to do is experiment a little first. I found it easiest to hold the tip about 1/2 inch above the cookie. The tiny thread of icing will follow. If you mess up, don't worry, You can wipe it off with a paper towel and start over.

When finished, set aside to dry for a short time before going to the second step.

Step Two

If you need more icing than is left, add another cup of powdered sugar. Either way, add another tablespoon of milk to the icing in the bowl. Mix and add 1/2 teaspoon of warm water at a time, mixing after each addition. After several attempts, I can tell you that it's easiest if the icing consistency is a little runny. I found it easier to use a squeeze bottle than a tip for this step. Fill the bottle or the pastry bag fitted with number 4 tip. Follow the general shape of the cookie as you squeeze and add a dot to any tiny areas, like a dog's tail. Use the toothpick or bamboo skewer to spread, and to push the icing to the edges and into small areas.

If you plan to use pearls, nonpareils, or sugar, use them now before the icing dries. Use the tweezers to place the pearls. I found I had more control over the sugar if I put it into a 1/4 teaspoon measuring spoon and used the tweesers to knock out as much as I wanted to use over the cookie. When finished, place in a cool area to harden overnight and up to 24 hours (this will depend on the temperature, humidity, and on the thickness of the icing). Store in an airtight container with parchment paper between the cookies.

Cut the butter into cubes to help it soften faster

The dough will have a nice consistency.

Make 2 balls out of the dough.

Roll it out between two pieces of parchment paper.
Refrigerate flat.
Place on parchment covered baking sheet to bake.
Fun decorating items!
Cool before icing.
Use the icing to outline each cookie.
Be sure to get those cute angles.
Use the thinner icing to flood the cookie. Here I have squeezed some out.
On the right side, I have helped the icing spread with a bamboo skewer. Note that the left side isn't perfect!

It's a golden Christmas!

Not a creature was stirring, not even the moose.


Happy Holidays to you all!